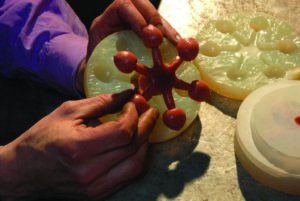
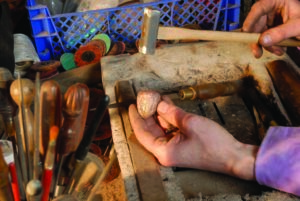
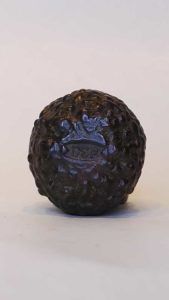
Original or master pattern. Master patterns can be made of virtually any material – either objects from the natural world – in this case I use real nuts – or patterns created for the purpose of reproduction in metal. Patterns can be made from wood, metal, clay, wax, or 3D prints. 3D printing presents some very exciting design opportunities. The ability to scale models up or down in size is particularly useful.
Rubber moulds are made with a 2-part liquid silicon that is mixed and poured over the pattern. Once the rubber is cured the mould can be opened and the pattern removed. Hot wax can then be poured into the cavity in the rubber mould to produce a faithful copy of the original. The rubber mould can capture the finest detail on the master pattern – even capturing fingerprints left by the artist on clay models.
Mould making is a huge topic and can be approached in many ways.
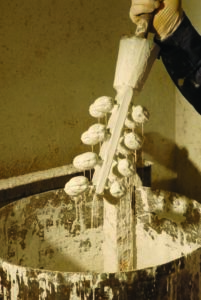
The rubber mould is used to make multiple pieces of wax. At this stage waxes are individually inspected for any flaws or visible mould lines. These are removed using modelling tools, any holes are filled with liquid wax using a hot iron. This process is known as fettling. Visible mould lines are known as flash.

Waxes are attached to a pouring sprue. The sprue resembles a trunk and once waxes are attached the complete assembly is known as a tree.
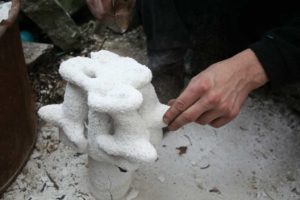
Wax trees are invested in a refractory mould. In these photographs the ceramic shell method is used. In other cases, I will use an investment plaster. Wax trees are dipped first into a ceramic slurry, once drained the wet surfaces are coated with a very fine ceramic sand. The freshly sanded/stuccoed trees are put aside to dry in the drying room. Once the first coat is dry the dipping sand coating/stuccoing, drying is repeated multiple times. Each time the mould is dipped successively coarser grains of ceramic sands are used until a thickness of approximately 6mm/1/4” thickness has been achieved. In the case of plaster investment wax trees are placed within a steel flask and surrounded with freshly mixed investment plaster. The mixing and pouring of plaster are carried out in a vacuum plaster mixing machine.
De waxing. This is where the ‘lost wax’ part of the process comes from. Dry ceramic shell moulds full of wax are placed into a hot furnace for a short time until all the wax patterns and wax tree have melted from within the mould. I will usually remove the freshly dewaxed shells from the kiln for an inspection. It is possible that expanding wax patterns have caused the moulds to crack. If any cracks are discovered, they are repaired using fire clay. The ceramic shells are then returned to a hot kiln for the ceramic mould to vitrify and fully harden in preparation for receiving molten metal. Investment plaster moulds once set are placed inside an electric kiln. The kiln runs a heating cycle for around 10 hours to remove the wax patterns and to drive off any water remaining in the plaster. It also holds the flasks at a suitable temperature for casting. In either case (ceramic/plaster) the space within the moulds once occupied by wax are now vacant and ready to receive molten metal.
Bronze – usually an alloy of copper and tin. The material I use contains a very small amount of silicon. This makes for an extremely tough and hard-wearing metal. The bronze comes to me ready alloyed as either grain /shot or as 7kg ingots. I also make sure I use any runner bars left from previous casts. Bronze can be re melted and cast many times. The foundry industry was recycling used metal for centuries before the term recycling was devised.
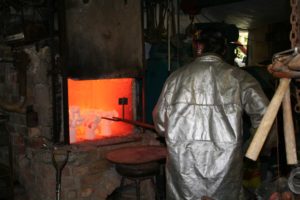
I use propane fired furnaces and graphite crucibles to melt molten bronze. I find it simpler to make my own furnaces and sometimes burners to suit my needs.
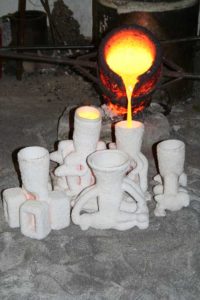
The bronze is brought to a temperature of around 1000 c to prepare it for casting into moulds. The crucible is lifted from the furnace with lifting tongs and placed into a pouring shank. Moulds are removed from the kiln before the crucible is pulled from the furnace.
Pouring takes place next. The metal is poured as efficiently as possible – not too fast but not too slowly either – this can be one of the most exciting but also nerve-wracking experiences! One slip and metal can end up on the floor or moulds can split and drain molten metal everywhere ruining the castings.
Plaster moulds in flasks. Investment plaster moulds are placed individually into a casting chamber which allows me to subject the flask to a vacuum. This allows atmospheric pressure to push down on the molten metal once it has filled the investment mould.
The mould is left to cool for a short time. Once the metal can be seen to have set the flask is removed from the vacuum chamber and set aside to cool further. Another flask can then be placed into the chamber and filled with molten metal from the crucible.
Once poured moulds are allowed to cool as the metal solidifies. As soon as they are cool enough to handle it is time to remove the ceramic investment. It must now be broken away from the castings. As the mould is destroyed it cannot be reused. The de mould is very much a moment of truth and it is the first time in the process that I can see if the cast has been successful. An exciting time a little bit like opening presents at Christmas. If the cast has not been successful then the whole process must be started again – make wax, tree, make investment mould, dewax etc. Any remaining shell is grit blasted from the castings. Investment plaster moulds – these are cleaned from the castings using water. If still hot enough the plaster will crumble away from the castings if the flask is plunged into a tub of water. Any remaining plaster is removed using a pressure washer and oxides removed using the grit blaster.
Castings are removed from the runner system using saws and metal cropping tools. All runner and gating system parts are put aside to be re melted. Any metal saw dust can also be re melted.
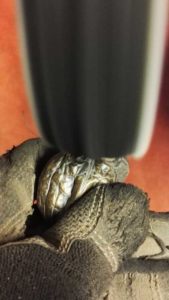
Now comes one of the time-consuming stages. The aim now is to remove any trace of the gating system from the casting. This is carried out by hand using files and abrasives. In the early stages abrasive belt machines are used but as I get closer to a finished surface, I will use files and rotary burrs to refine the surface of the casting. To finally refine the surface finish, I use a barrelling machine loaded with fine grade abrasive ceramic pellets. An abrasive process that takes about 2 hours.
Nearly there! Once washed and dried the castings are given a final inspection. Once they have passed the inspection, I will then apply my maker’s mark using a hardened steel punch.
Once marked the castings are ready to be patinated or polished.
Patination – a whole craft of its own. Castings are heated and exposed to any number of chemical solutions in order to cause the surface to oxidise in an array of pleasing colours. Raw bronze if left out in the elements will oxidise naturally over time. An oxidised surface will act as a protective barrier and prevent the underlying bronze from oxidising further. Once the desired colour has been reached the surface is dried with a flame and a light coating of wax is applied. The wax can be buffed once cool to provide a pleasing shine. Throughout its life a patinated bronze can be regularly waxed and buffed to deepen, ideally protecting the finish.
a buffing machine is used to polish the surface of a bronze. I will usually use 2 grades of metal polishing compounds to create a pleasing polished surface. Alternatively, I will use a barrelling machine loaded with polished steel shot and castings. The shot burnishes the surface of the castings and is very good at reaching recessed areas giving finely detailed castings.
Patinated – apply wax polish and buff with a soft cloth. Beeswax based polish is preferred but clear shoe polish works too.
Polished – this surface will naturally oxidise with time reacting to handling and its environment. If desired, it can readily be re polished with a small amount of Brasso or Peek metal polish. Apply with a cloth then buff with another soft cloth.